In this post I want to spark your creativity and help you get the most out of your stamps by offering you tips and tricks to make the most out of your stamps.
The video is here or watch at YouTube:
#1 Play
Get out a bunch of inks and start stamping.
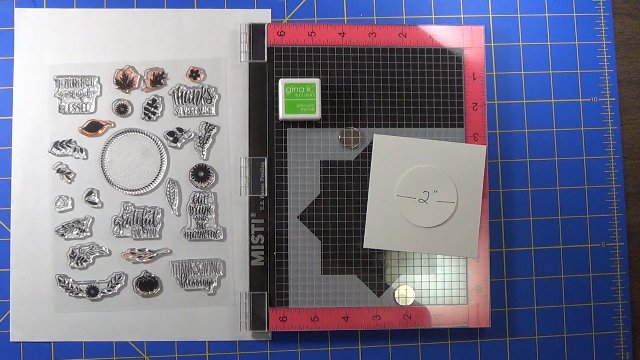
Using the stamp set and the Template together require some practice.
Lesson learned: If you don’t use magnets to anchor the cardstock square, it may stick to the stamp or move. This is not a major problem, but it minimizes stray ink smudges and helps keep the stamp lined up accurately if you have to stamp a second time.
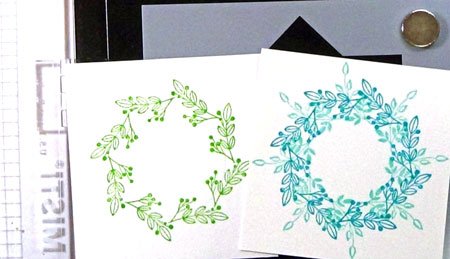
Playing with various stamps and ink colors will lead to happy accidents. Discovering that some leaf images resembled a snowflake when layered on top of each other happened because I attempted to stamp a wreath with almost all the stamps in the set.

Use stamps going the “long way” around the center as well as sticking out straight.
Using several stamps at a time made wreath building faster, but also meant I had to learn to skip a turn (turn two notches) with the template or the stamps would overlap too far for my liking.

Having a bunch of pre-cut squares makes it fun to just keep stamping and stamping…
#2 Measure
Decide the size of your wreath center first.
Start your wreath-making process by deciding how big or small you want your center. Measure your sentiment or a center frame element. Cut out, diecut, or punch a piece of cardstock with the same diameter.

Use the diecut as a guide by tracing it lightly with a pencil in the center (or wherever!) you want your wreath on your project.
If you have a circular stamp that is going to be your center, you can trace it on your project, instead of using a separate diecut.

If you don’t want to have a pencil line to erase or to have to cover up later, temporarily adhere the diecut circle shape to your project. Position your stamp or stamps around the edge of the circle shape. When you are ready to stamp, transfer the stamps to your stamp-positioner cover, and then remove your circle shape.
#3 Color
Color plays an important part in your project.
Working with small ink cubes for these little stamps makes wreath building fun. Many brands like Memento, Tim Holtz Distress Ink, and Hero Arts offer the small size ink pads. It is economical to try many different colors this way.
If a brand offers a collection or curated assortment, you can get one set and it will make the color decisions easier and more cohesive for your project.

It is not impossible to use full-size ink pads with the small images, but the risk of smudging your ink is greater. Consider using a finger dauber or foam tool to transfer ink from a full-size ink pad to your stamp.
Mix colors on the stamp. Ink cubes or a finger dauber allow you to get into tiny spaces of your stamp with different colors.

Go Monotone. A tone-on-tone look with ink that coordinates with the cardstock makes a great background. If you don’t have coordinating ink, try stamping on colored cardstock with a watermark (Versamark) ink pad. The ink will dry a bit darker than the cardstock.
#4 Wreaths are Optional
The GKD Wreath Builder Template is very helpful to create wreaths; however, the stamp set does more than make great wreaths.
The center frame image from the set can be stamped with one of the floral motifs and/or a sentiment and used on a project that is not wreath-related.

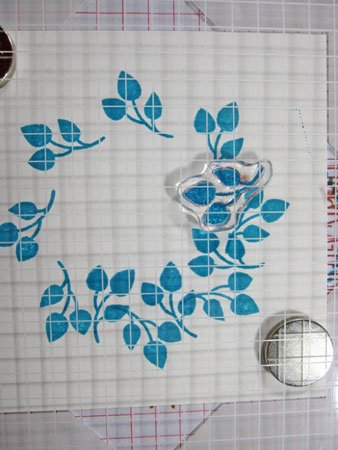
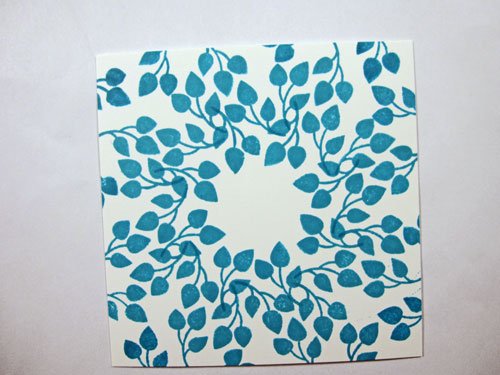
The small images can be nestled together and stamped as a background or partial background with wonderful results. A stamp-positioner tool is a must for this technique to keep the images in the pattern you want, especially with stamping multiple backgrounds.

Arrange stamps and stamp the bottom 
Flip cardstock and stamp again 
Re-position stamps to fill in the middle 
Stamp again to complete

Stamp around, then Re-position Stamp and Stamp around again 
2 Full Rounds of Stamping 
4 Full Rounds of Stamping, then fill-in as needed
The small size images are great for little projects like envelopes, labels or for stamping in a planner.
#5 Think Outside the Season
Autumn Wreath Builder Stamp set has many uses outside of the Fall season.
Several leaf and flower images can be used year-round or for occasions like Christmas or even a wedding as seen in the wreaths featured on the square Thank You card set at the top of this blog post.
Repeat stamping can create backgrounds that span seasons (see backgrounds above).
The same leaf pattern stamped in green can be spring, summer or Christmas or when stamped in pale blues or or grey/silver can be a winter or wedding theme.

Using similar colors can create an ombre or rainbow wreath.

Now it’s your turn. What are your favorite techniques with small images like the ones in the Gina K Designs Autumn Wreath Builder stamp set?
Thank you for visiting today!
Stephanie
