 Hello! I’ve been away too long, but the news is good as I finally have a full-time job with a great small company. I’ll be posting randomly until I can get into a new schedule of creating.
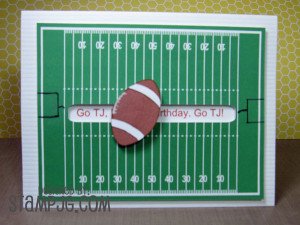
Today’s card is a celebration of my nephew’s birthday. He is a big sports fan, and it is September — that means FOOTBALL! I usually make some sort of interactive card for his special day, so this is a penny spinner card.
I’m thinking of taping his real gift ($$ teenager $$) to the back of the card to see if he thinks I only gave him two pennies for his gift. Heehee. 🙂
I did not use any stamps on this card. The whole thing is generated on my Silhouette digital cutting machine. I have the older SD version of the Portrait, but you wouldn’t guess that this machine is a few years old and very well used loved… It cuts beautifully. Love it!
Creating this card in Silhouette Studio (I have the Designer Edition):
- Re-size the football field (Design ID #46856) print and cut shape to fit on to a standard A2 (4.25″x5.5″) card front
- Create a long, narrow rectangle (.375″ x 3.6″) that will be cut out to make the “slot” for the slider
- Copy the rectangle shape below and use it to determine the size and width of the text you want to print
- Center the original rectangle on the football field shape and group them together
- Re-size the football shape (Design ID #46930) to fit on the card front. I filled the football with a football pattern (Design ID #22600) from the Silhouette store. I love this feature!
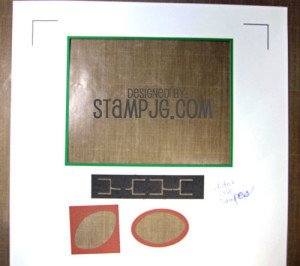
- Send the file to your printer (don’t forget to show the registration marks)
- Type your text and then delete the small rectangle (or enlarge it to create a cut-out shape around your text)
- Print the images on your printer. I used Neenah Solar White cardstock
- Take your printed cardstock and send it through the Silhouette machine
- I added the goal posts with black marker and the lacing on the football in white gel pen
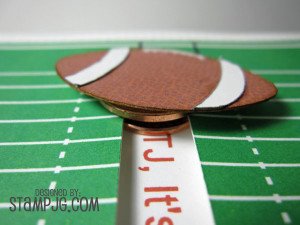
Adhere two pennies together with a small foam circle (I used a Stampin Up! dimensional which is not truly round). Adhere the football cutout to the top penny with glue dots. Carefully place the penny in to the slot on the card, with the edge of the slot between the two pennies. This allows the pennies to slide the length of the slot. Fun!
 Tip #1: Sometimes the Silhouette doesn’t cut the edges perfectly around the printed shape and a bit of white cardstock shows. To minimize this, create a very small border or shape around the original and fill it with the same color or pattern. Remove the cut lines of the second, slightly larger shape. This creates a small color bleed area outside of the original shape so no white cardstock will show around the edges.
Tip #2: Ink, distress or use a marker on the edges of your cut shapes so that the white “core” on the edges doesn’t show.
What are some of your favorite interactive cards to make? I’d love to get some ideas for my nephew’s Christmas card!
Thanks for dropping by!
Stephanie

